Showing posts with label gift. Show all posts

Tuesday, January 17, 2012

Obsessed With Stationary

I don't know if you guys know this, but I love stationary. Like, a lot. I really love fun stationary too. I don't like the boring pens and pencils you can get from Walmart or whatever. I also like pencil cases and letter holders and all sort of fun office stuff.
I like design anyway. Anything that is cute and creative is my sort of thing.


Sim Card Note-book
{via}


See, this is exactly what I am talking about. It's unique instead of some frumpy old little boring notebook, it's fun!


Animal Clip Holder


{via}
Isn't it so cute? It's better than a little plastic case that's see through and ...eww.


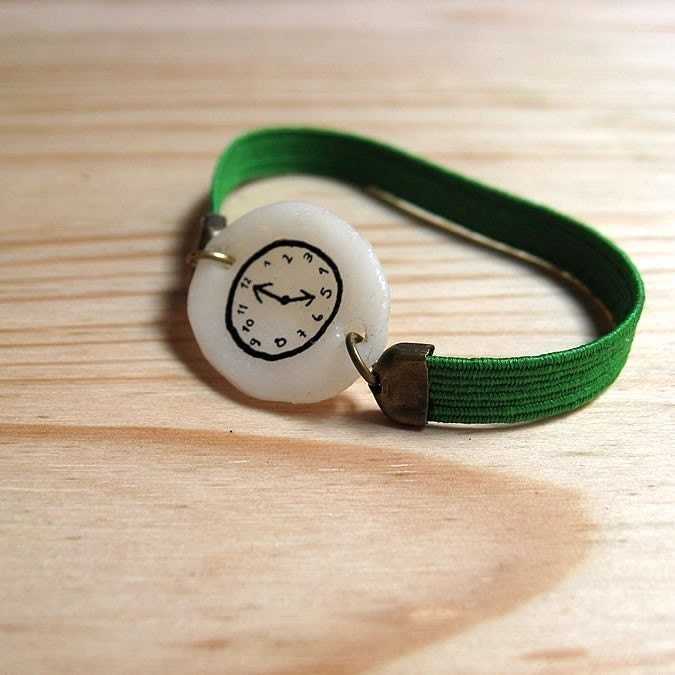
Fake Watch Bracelet


{via}


I have never seen this idea before but I kinda love it. It's definitely a good gift for somebody with a sense of humour.Buy it here.

Armed Notebook
{via}
These cute little notebook are popup-ish. I mean like, the cover of the 3-D ish thing stands out. It doesn't come out. It's like in the cover or the book while still being out? I'm bad at explaining. 
Get it here.

4 Function Ruler Pen

{via}

I am in love with this right now. I think I'm going to order this right now. This pen cab function as a ruler, a pencil, a pen, a highlighter or a PDA stylus. So it won't take up space in your pencil case and you won't have to buy so many back to school things.
Get it right here, right now.


Scented Eraser Rings


{via}
Anybody that really knows me, know I wear rings. Like a lot. I love rings. And now I can go out and buy scented eraser ones. These are PVC free and they look so fun and so cute. 
Buy that here.

Scroll Pen

{via}
I am also forgetful. Great, now we've learned two things about me. Anyways, this pen is amazing. You write down a reminder and then I look at my pen and it reminds me of what I had to go do! I'm excited. I really want this pen too!
Buy. Here. Now.


Enough stationary for you yet? One of my friend {ahem, Shannon} will be doing a geust post for The Rant Challenge. {She kinda sucks.} Jokes. Love her.
♥Rachel


Friday, January 06, 2012

More Handmade Envelopes & Cards

Check out my handmade envelopes post to find out how to make these envelopes.


I made the other envelopes by basically writing on a fresh sheet of paper and then folding it into an envelope. 


Like my messy writing?


  I find these super handy and easy to make. If I forgot someone's birthday, just pop a card inside and I'm good to go.


I tried making handmade cards. It's ok.


Sorry, the shot's blurry.
This one, I totally failed on. I'm pissed. I ruined it and it looks like complete crap now.
Whyy?


♥Rachel

Glittery Paint Chip Magnets


These magnets are incredibly easy to make and they look amazing on the fridge afterwards.


You will need:
-glitter glue {Mine is crayola 3D}
-magnets
-paint chip circles


1. Cut out some paper circles. { I had to hand cut mine because no circle cutter.}

2. Squeeze out little bits of glitter glue and spread around before you squeeze out another bit. You can use a toothpick to help you move some of the glitter around so they are not in clumps.


3. Wait for glitter-glue to dry and then attach magnet onto the back with either a gluegun or with you have those sticky magent back ones.
Sorry for the crappy picture quality.

4. Stick onto fridge and admire.

These are litterally so quick and easy to make. I'll have to make bundles of them so I can use them for small gifts in emergencys.

♥Rachel

Wednesday, January 04, 2012

Handmade Envelopes


I hate plain paper envelopes so I decided to make my own paper and then make an envelope out of it.


So for this project, you will need:
-water colours ( mine is Crayola)
- a paint brush
- masking tape
-paper 
- deconsturucted envelope


1. Take your envelope and unfold it carefully. Trace the envelope onto the paper so you have a template to cut around. Cut out your template.
2. Cut a long strip of masking tape and cut it in half. Lay the masking tape gently down onto your template. Repeat until you have as many strips as you want.

 
3. Use the watercolours to paint in between the gaps you have created with the masking tape. Peel off the masking tape when the paint is dry. It is handy to have a tissue by your side because the watercolours may drip. 

 4. Repeat step 3 over and over until you are finished.

5. Wait for the paint to dry and then fold and glue your template into an envelope.
 I kinda screwed up the red there because it leaked and the colours are much softer but I had to picnik it because of the bad lighting.

Haha. Look at my wonderful tissue after dabbing at it so many times. I'm going to let it dry and see what it will look like tomorrow.
A tie-dye tissue.

It's good to be back posting tutorials but I'm not finished with The Rant Challenge yet.
♥Rachel

Tuesday, December 20, 2011

Quickie Christmas Gift


Yes, I'm sorry that the picture quality is very bad. It was taken at night with a low battery and I'm very sorry.
On to the tutorial.
You will need:
-paint chip circles
-paperclips
- magnetic tape ( if you want. )
-gluegun

2. I chose the circles that I liked with the colours that matched and I glued them together.


3.I glueguned the finished circle onto the paper clip exactly there. 
If you wanted, you could skip on the paper clip and attach a magnet on the back instead.
♥Rachel

Stiched Christmas Ornaments


 I had some leftover bristol board and cardstock so I decided to make some stitched ornaments. I drew out my template( tree or present) and I poked some holes using a pushpin. Simple right? Anyways I threaded the thread through the already poked holes and added a simple bow. Cute and easy!

♥Rachel

Monday, December 19, 2011

Unique Giftwrapping Ideas

I'm finally getting into the Christmas feeling. Sorry I haven't posted. I've been really busy trying to finish buying gifts and setting up my tree.


Eco-friendly Gift Wrapping from Martha Stewart


Martha Stewart has some awesome ideas on how to gift wrap. I really like the Chinese newspaper and the maps.

Tinfoil Gift Wrap via The Gift Wrap Blog
If you don't feel like spending money on gift wrap this is perfect. Everybody has tin foil and it would look really good with some black or pink.

Kids Artwork Gift Wrap via Martha Stewart  


This would be so easy and fun! Simple solution to write like a kid: Write with the hand you don't usually use.  Adorable. Martha does everything perfectly!

Miu-Miu Style Wrapping via Ambrosia Girl

The ribbon ties it all together and the glittery labels are so much fun!

4 days till' Christmas!
♥Rachel


Friday, September 16, 2011

Amazing Newspaper Gift Toppers


So I have decided to do a tutorial on making newspaper gift toppers. It's eco- friendly and plus it's super fast and fun to make! 

You will need:

Some newspaper or flyers.
Scissors
A compass ( the geometry set kind.)
Stapler
Glue gun ( optional)
A good hand.


 So first you take a sheet of newspaper or a flyer or whatever paper you can find and you fold it a bunch of times in half.
 Then you use a compass (while the paper is still folded in half) to draw a circle on the sheet of folded paper.

 Cut out the circle.

 Seperate the sheets to make sure you cut out enough circles. ( You should have at least  if you have folded it enough times.)

 Put the sheets back together and cut slits of different lengths all around the circle. Some should be long and others short. Be sure not to cut the slits too long so that they touch. It will break and you will have to start over.

 Seperate the sheets so they do not stick together. Put them back together after.

 Staple the circles in the middle of it and be sure to get every circle.

 Crumple the stapled circles gently. Some pieces might fall out.

After you are finished crumpling, try and make it look a little bit more presentable.
There you go! Wasn't it easy? To attach to  a box or a gift, gluegun the bottom where the staple is and stick it onto the gift. My first tutorial and your first gift topper! Follow me to get more tutorials and comment to tell me how you did!
-Rachel